Halloween Drink Ideas Checklist: A Spooky Party Drink Planner for a Smooth, Festive Night
A Halloween drinks menu feels fun until it turns into last-minute store runs, missing mixers, and a half-finished punch. A simple drink checklist and planner keeps everything organized—what to serve, what to buy, what to prep ahead, and how to set up a self-serve station that looks themed and stays practical. Below is a straightforward way to plan a small to medium Halloween gathering so the drinks look spooky, taste balanced, and stay easy to refill for both adults and kids. For more guidance, see 24 Baking Bucket List Recipes Every Home Baker Should Try.
What a Halloween drink checklist helps prevent
- Too many “single-use” ingredients that don’t pair well across recipes
- Running out of ice, cups, garnish, or non-alcoholic options
- Sticky, cluttered drink areas without labels, trash bins, or spill control
- Drinks that look spooky but taste unbalanced (too sweet, too sour, too strong)
- Guests unsure what’s in the punch (allergens, alcohol content, caffeine)
When the plan is written down, it’s much easier to consolidate ingredients across recipes (one citrus, one berry, one bubbly mixer) and to build a station that prevents bottlenecks—especially once costumes, dim lighting, and party traffic are in play.
Pick a drink theme that’s easy to execute
Start with one visual motif and repeat it on purpose. That consistency makes even simple drinks look “styled” without extra work.
- Choose 1 motif to repeat: “witchy greens,” “blood reds,” “smoky purples,” or “glow-in-the-dark” (use blacklight-safe cups and neon mixers).
- Limit the menu to 3–5 total drinks: one signature punch, one bubbly option, one warm option (if desired), and at least one mocktail.
- Build around a shared base: citrus + ginger beer, cranberry + lime, or pineapple + coconut to reduce shopping complexity.
- Decide service style early: bartender-made (slower, cleaner) vs. self-serve (faster, needs signage and a spill plan).
Simple Halloween Drink Menu Builder
| Drink slot |
Best format |
Prep ahead |
Guest-friendly notes |
| Signature punch |
Large bowl/dispenser |
Mix base; add bubbles at serving |
Offer a mocktail version beside it |
| Bubbly sip |
Flutes or plastic coupes |
Chill ingredients |
Keep it low-mess and easy to refill |
| Batch cocktail |
Pitcher |
Pre-mix; garnish station |
Label strength and key ingredients |
| Mocktail highlight |
Pitcher or cans |
Pre-mix; chill |
Make it look as special as the alcohol option |
| Warm drink (optional) |
Slow cooker |
Make 1–2 hours before |
Include dairy-free option if creamy |
A practical planning timeline (from 7 days out to party night)
- 7 days out: choose the menu, note dietary needs (non-alcoholic, low-sugar, caffeine-free), confirm glassware/cups, and decide if dry ice will be used.
- 3–4 days out: buy shelf-stable items (mixers, syrups, juices, bitters, paper goods, labels, straws, napkins).
- 1–2 days out: prep garnishes (citrus wheels, sugar rims), make simple syrup, freeze themed ice (berries, gummy rings, edible glitter if used).
- Party day: chill everything, set up a drink station with a “start here” sign, and keep refills in the fridge/cooler.
- During the party: rotate fresh ice, wipe spills quickly, and keep a separate bin for empties to avoid clutter.
Crowd-pleasing drink ideas (spooky without being complicated)
Shopping list categories that save time
Set up a self-serve drink station that stays tidy
Safety notes for dramatic effects (fog, dry ice, and glow)
- Dry ice: use only in a larger container where it won’t be swallowed; never place dry ice directly into a drink glass. Use gloves/tongs and allow it to fully sublimate before serving from small vessels. Review official guidance from the U.S. Food & Drug Administration.
- Food coloring and edible glitter: choose products labeled for consumption; avoid craft glitter.
- Allergy awareness: clearly mark dairy, nuts, and any common allergens; keep a simple non-alcoholic option without dyes. Helpful reference: Food Allergy Research & Education (FARE).
- Alcohol clarity: label “strong” batches and keep a separate mocktail station to avoid mix-ups. For health context around alcohol, see the CDC’s alcohol and cancer risk information.
Use a printable planner to make prep effortless
Digital downloads to simplify hosting
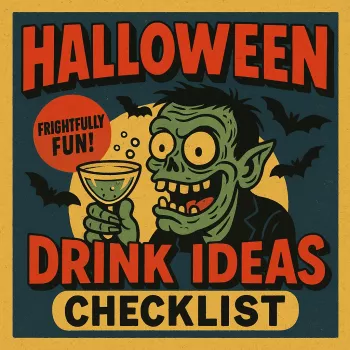
If you want the checklist approach already laid out (menu slots, shopping categories, prep timeline, and station notes), use Halloween Drink Ideas Checklist | Spooky Party Drink Planner (Digital Download) to keep decisions quick and prep organized for mixed-age gatherings.
For an extra layer of atmosphere once drinks are poured, queue up a short reading session or “lights-down” intermission with Shivers After Dark: Crafting Scary Stories for Adults (Digital Download)—a fun way to add themed entertainment without adding more party-day tasks.
FAQ
How many drinks should be planned for a Halloween party?
Plan about 2 drinks per person for the first hour, then 1 drink per person for each additional hour. Include at least one appealing non-alcoholic option, and prioritize one batched drink (like a punch or pitcher cocktail) so you’re not mixing individual servings all night.
What’s the easiest way to offer both cocktails and mocktails without doubling the work?
Use a shared base (juice + citrus + spice or ginger) and split it into two labeled dispensers: one stays zero-proof, and the other gets a spirit added. Keep one garnish station that works for both so presentation stays consistent.
Is dry ice safe for Halloween drinks?
Dry ice can be used safely for fog effects when handled correctly: never ingest it, don’t put it into individual glasses, and use tongs or gloves. Keep it in a larger vessel for the effect and let it fully sublimate before serving from smaller containers.
Recommended for you










Leave a comment